1. Preparing a natural fermentation indigo dye vat
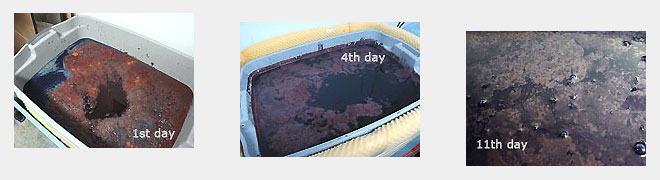
Mix all ingredients, natural indigo, madder root, wheat bran and soda ash, in rain water of the vat, and keep it 95°F to 110°F for one week to two weeks to ferment. During this time, all we need to do is stirring the solution once a day and just wait, watching the vat condition carefully.

A couple of days later, we notice a bit smell of ammonia, this is a right sign that the fermentation process has just began properly. In this state, very few amount of indigo has reduced, and it will dissolve in alkali water. This smell is getting stronger gradually day by day.
Then another few days later, we recognize that cooper thin film is formed all over the vat surface. This means that the enough amount of indigo has reduced to dye. The film is the pure indigo which was oxidized again on the vat surface. The vat is ready now.
2. Refining cotton

It’s very important to remove all starch and grease from cotton as much as possible before dyeing to get fine result. Because, if starch and grease remain on cotton cloth, indigo dye will be washed out with them together. Indigo dye must be fixed into cotton fiber itself.
For reference, we use the power of Japanese sake’s bacteria to decompose starch into sugar and water(bacteria again!). We don’t use any chemicals to do it.
3. Shibori process (tieing clothes)
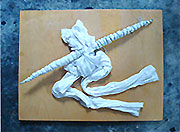
Choose a material and a design. Then draw the outline on it by a water-dissolve ink pen roughly.
This process is plain and simple job. But every single tieing must be done carefully and properly. These tieing will be reflected to the dye result directly.
Always imagine how the pattern will come out. Don’t rush. Walk, don’t run. If we have a little bit wrong feeling about the way to tie, we should start it over again, even It will take more time.
Any small mistake can not be corrected after all the dye process has done.
4. Dye process
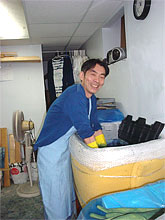
Now, everything is ready to dye. First, soak the cloth in stored plain rain water to make the penetration of indigo easier, then squeeze tightly and put it in the indigo vat solution very gently.
We must be sure every time the reduced indigo meets the air, it will be oxidized again. This means the vat solution will loose the dye power little by little with any kind of oxide.
In the vat, the cloth is repeated squeezing and loosening to absorb the indigo evenly and deeply for three to five minutes, then it will be pull up into the air slowly.
Right after the cloth appear in the air, the color is green, which is reduced indigo color. Soon, it will turn to dark blue. The indigo has just oxidized again and fixed inside of the fibers.
Unfortunately this single session can dye only very light blue. If we would real dark blue, the session has to be repeated five to seven, eight times. It depends on the vat condition and how deep we wish to dye.
Also, the cloth needs to be exposed to the air for twenty to thirty minutes between each session to oxidize entirely.
After the color reaches to the deepness desired, wash it out and untie it. This is the most excitement moment during the whole dye process. All the effort has been done for this moment.
Next, rinse it to remove unfixed indigo. We repeat this rinsing three times with eco-friendly detergent. So, when you wash it yourself, rinsing water is almost clear. You don’t have to worry rob off the color to other garment. However, the product should be washed separately at least two to three times just in case.

These are the description of very rough dye steps to let you know how we are doing the natural indigo dye.
5. At last
The final step is your turn. You can wear a thousands years’ old dye method T-shirts, or even dye it yourself in the same way that the ancient people had been doing long, long time ago. Enjoy!